Overview
Every school day needs to be added to the Calendar. No attendance can be received or entered until the day exists in the Calendar.
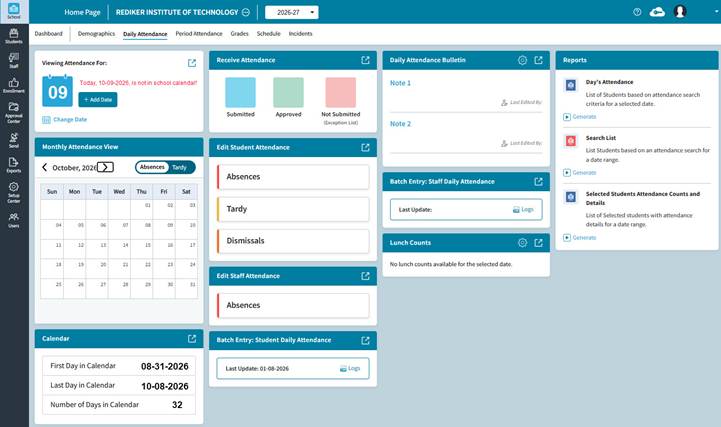
To add a day in the calendar, go to School > Daily Attendance (or Period Attendance).
Fig 1: Overview
Adding a Day to the Calendar
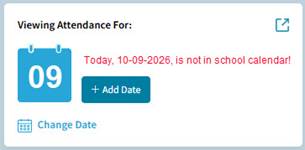
In the Viewing Attendance Tile, click the Add Date button.
Fig 2: Viewing Attendance Tile
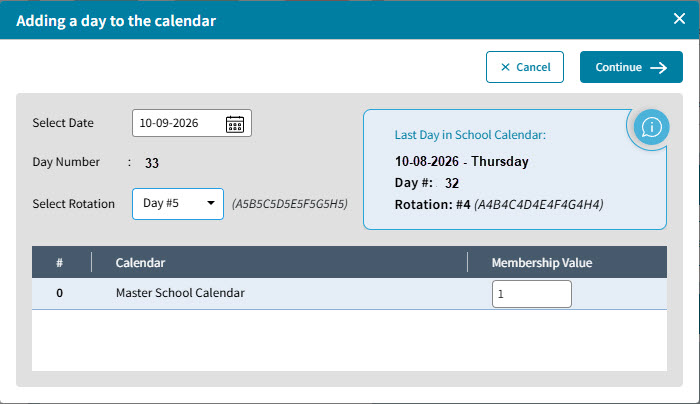
The Adding a Day to the Calendar window will open.
By default, today’s date will be selected at the top left. Select the rotation using the drop down menu.
By default, the membership value of the day will be entered as 1. This should remain unchanged unless a day is to be added to the calendar that should not count towards a full day for students. For example; Staff are reporting to school for an in-service day, but students are off.
On the right, the information about the previous day in the calendar will be displayed.
Click the Continue button to get a confirmation window, click the Add Date button to add the day to the calendar.
Fig 3: Adding a Day to the Calendar window
Insert a day into the calendar before or after an existing day
If a day needs to be added to the calendar that is not “today”, it needs to be added from the Master Calendar.
To insert a day in the calendar, go to School > Daily Attendance (or Period Attendance). In the Calendar tile, click the Navigate icon to open the Master Calendar.
Fig 4: Calendar Tile
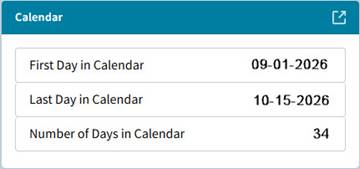
Fig 5: Insert a day into the calendar
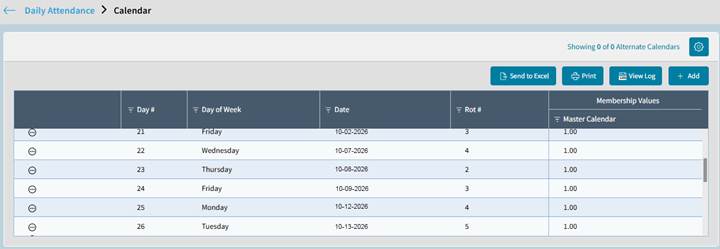
In this example, we need to insert Tuesday, 10-06-2026 in between the line for day 21: Friday 10-02-2026 and day 22: Wednesday, 10-07-2026.
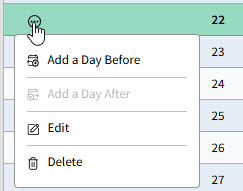
Click the ellipse button on the line that you want to insert a day in front of, and select “Add a Day Before”. In our case, day 22: Wednesday, 10-07-2026.
Fig 6: Ellipse button – Insert a Day
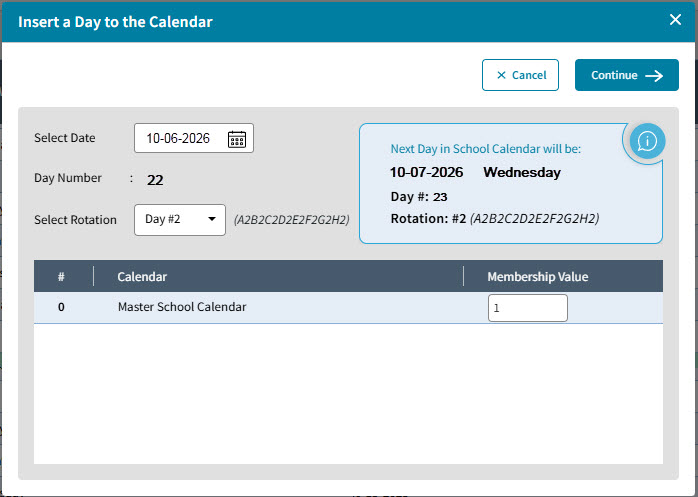
The Insert a Day to the Calendar window will open. It is exactly the same window you get when you are trying to Add a Day to the Calendar, the only difference is the title of the window.
By default, the day you are inserting will be selected at the top left. Select the rotation using the drop down menu.
By default, the membership value of the day will be entered as 1. This should remain unchanged unless a day is to be added to the calendar that should not count towards a full day for students. For example; Staff are reporting to school for an in-service day, but students are off.
On the right, the information about the next day in the calendar will be displayed.
Click the Continue button to get a confirmation window, click the Add Date button to add the day to the calendar.
The new day will be inserted into the master calendar, in our case as day 22, and all the subsequent days that already exist will move down one day number.
Fig 7: Insert a Day to the Calendar window
Edit or Delete a Day in the Master Calendar
To edit or delete a day in the calendar, go to School > Daily Attendance (or Period Attendance). In the Calendar tile, click the Navigate icon to open the Master Calendar. Find the day you wish to delete, and click the ellipse button. Select Edit or Delete.
Fig 8: Ellipse button – Edit or Delete a Day
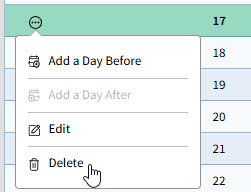
In our example, we are going to delete Saturday, 9-26-2026, which was entered incorrectly as Day #17.
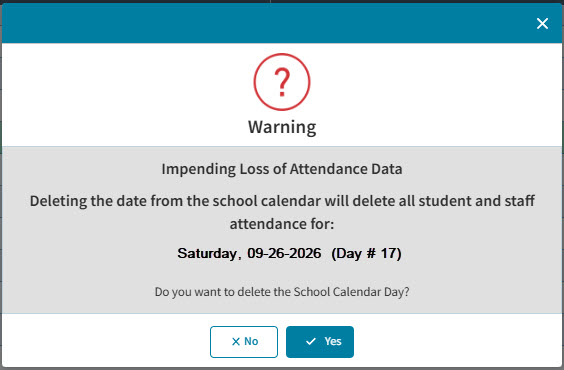
Once we select Delete, this confirmation window opens, clicking the Yes button will delete the day from the calendar.
Fig 9: Delete a Day in the Master Calendar