
Batch Adding Student (or Staff) Photographs
Overview
Every Student and Staff member in AdminPlus.com can have a photograph connected to them.
In this article, we will show you how to upload multiple photographs at once (Batch Adding).
For directions on uploading photographs one student (or staff) at a time, refer to the help article: Adding Student Photographs.
To go directly to the video showing the Batch process, click this link: Video: Student Photos - Batch Upload
Step One - Take the Student / Staff Photographs
- Photos must be formatted as .jpg images
- Photos must be named with one of the following unique student / staff identifiers: APID, UNID, GUID, or a Unique Demographic Field.
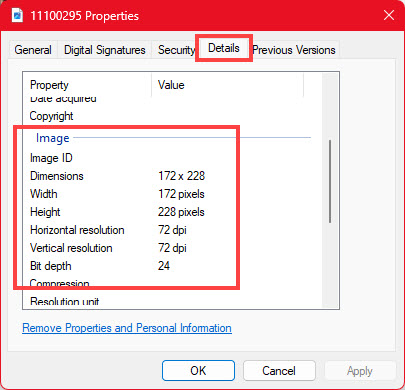
- Photos should be 172 x 228 pixels, be in 72dpi, and 24-bit color.
Please note: photos larger than preferred specifications may not display properly, slow your AP.com user experience, or possibly they will not display at all. If the preferred dimensions are not possible, any dimensions with a 3:4 (width:height) aspect ratio can be used.
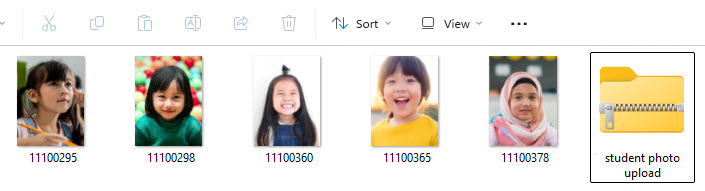
- Save the photos in a folder, named as outlined above.
- Image properties can be checked by right clicking on the photo, and selecting properties. Click the Details Tab, and scroll down to the Image settings.
- Once all photographs to be uploaded have been taken, correctly formatted and named, compress them into their own zip folder.
Step Two - Using the Photo Batch Process
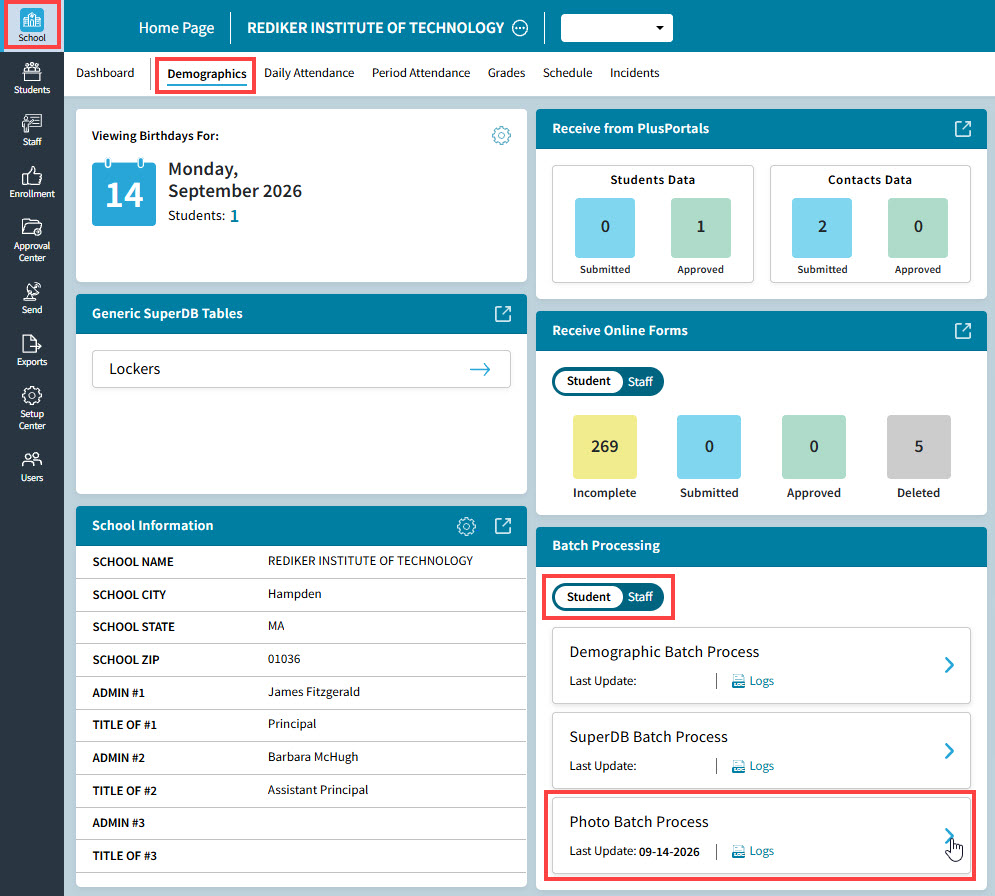
- In AP.com, go to School -> Demographics -> Batch Processing.
- Select either Student or Staff with the toggle.
- Click the blue arrow to the right of Photo Batch Process.
- Set the unique identifier you used as the photo file name.
- Select the zipped folder of photographs.
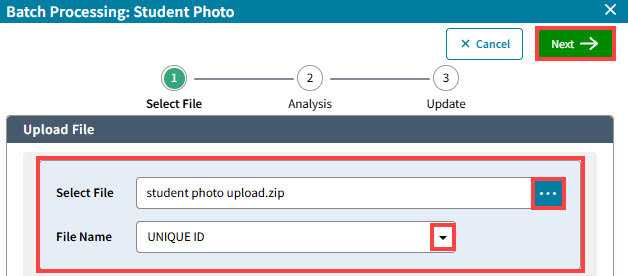
- Once the zipped folder has been selected, click the green Next button.
- The Batch Processing Tool will analyze the zipped folder of photographs, and give an analysis of the proposed upload. Click the View Results link to see the students (or staff) whose photos will be uploaded or replaced. To perform the Batch, click the green Next button.
- The photo upload will complete. Click the green done button.
- Click Video Link below for step by step instructions on Step Two.
Video: Student Photos - Batch Upload