All of the content of the website is organized into 4 main sections or areas:
- Pages are your main level of organization on the website and are in the Pages panel on the left.
- Rows are sections that divide a page into horizontal segments.
- Columns subdivide a row and allow content to be side by side (desktop)
- Widgets are the actual content on the page.
All pages by default will display the header and footer of your site, and additionally, will have at least one row and one column for content.
TABLE OF CONTENTS
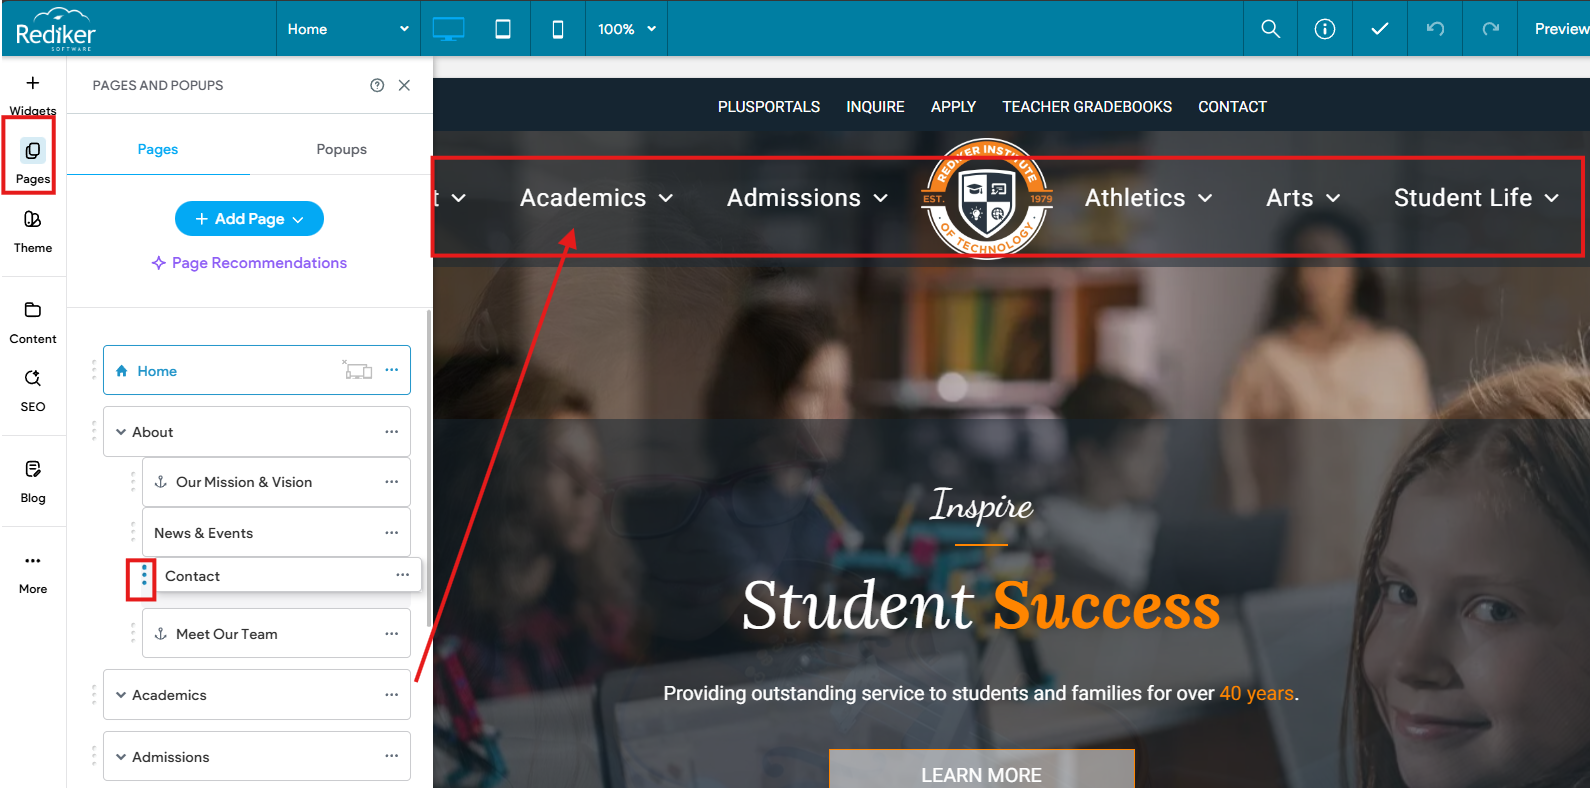
Pages
The Pages Panel allows you to reorder, manage, and create new pages in your site. Organize your site's content and s by using multiple pages to improve your visitors' experience and increases the chance that they will find the information they need. By default, your website's Navigation is a direct reflection of and controlled by the pages in the Pages Panel (name, order, etc.). You can drag and drop pages in the pages panel to change their order.
You can create a maximum of 1000 site pages and popups, and 1500 blog pages. Dynamic pages do not count towards the page count.
Be mindful of page names; keep them short and concise. Also, fewer pages make for a better user experience as it will make things easier to find, we recommend no more than 5-7 pages displaying at a time. You can also create page "anchors" to help navigate to a specific section of a page (this also reduces the number of pages while increasing the quality of page content).
To access pages (and popups), in the left panel, click Pages.
To add new pages to your site:
- In the left panel, click Pages.
- Click + Add Page
- Select a page type:
- Page Builder: Allows you to plan out a page layout using "Designed Sections." Starts you out with a empty page with the Designed Sections menu open to add from. This also now allows you to have a section in your Pages Panel for "Pages in Progress."
- Blank Page: Start from scratch with a blank page that would have a single row and column with no content to start. All pages including blank pages would by default also show the header and footer as well.
- Designed Page (Page templates) are prepopulated with relevant widgets.
- Dynamic Page: Selecting a dynamic page template automatically adds a connected Internal Collection. For more information, see Dynamic Pages. This is an advanced feature and only recommended for experienced users.
- Navigation Folder: An organizational tool, this puts a "Titled Folder" into to your pages menu to help organize pages. If visible to your navigation, it will NOT be a clickable page.
- Page URL: The Page URL page type links the page to another URL instead of creating a new page.
- Type a title for your new page, and a URL, if necessary.
- Click + Add Page and start creating your new page.
It is highly recommended that instead of creating a new blank page, that you "Duplicate" an existing page. This not only saves time it also ensures consistency in your page layouts. Simply open the Pages Panel and click the three dots to access the page settings, and choose Duplicate.
Reorganize Pages
To reorganize the order of pages that display on your site:
- In the side panel, click Pages.
- In the Pages Panel click and drag a page to move it where you want it to appear in order. Drag the page using the 3 vertical dots to the left of the page name. Pay attention to the grey shadow indicating where the page will be released.
- Drag a page slightly in and to the right to nest the page as a sub-page of the page above.

Pages and Navigation can only have up to 3 levels of pages.
Page Settings
Access page settings by clicking the settings icon (three dots) next to each page in the Pages Panel. You have the following options:
- Rename. Renames the page in the editor. Note this does not change the page URL.
- Show or Hide from Navigation. Make the page hidden on the navigation menu. It will still be accessible and visit-able by the direct URL. Use set as draft if you want the page to be off limits and inaccessible.

- Duplicate. Creates an exact copy of the page.
- Publish page. Publish changes on a single page.
- Page URL. Customize the URL for the page.
- Edit Page SEO. Access all the SEO settings for the page. For more information, see the SEO section.
- Set as Home Page. Allows the page to be set as the Home page for your site (index). Great for temporary landing pages, or under constructions pages.
- Set Access. Set a password for the page or configure the page for members only. For more information, see Password Protected Pages.
- Convert to Dynamic Page. Click to convert the page to a dynamic page. Select a collection, and click Done. For more information, see Create Dynamic Pages.
- Set as a draft/Stage for Publish. Set a page as a draft when you do not want it to be searchable (by engines) or on the live site. It also makes the page inaccessible (the direct page URL will render a 404 error). When set as draft is enabled on a page, a pencil icon will appear to the left of the page name. It also automatically sets the page to Hide on all (so that drafts are not showing in the pages panel. When a page is a draft, choosing the page settings again will now show Stage Draft for Publish, choosing that will unhide the page, and next time you republish your site the page will no longer be a draft and will be visible and accessible again.

- Delete. Completely deletes a page (bottom option). Note there is no undo or trashcan, the page is gone. It would require a site restore.

Rows
All pages are subdivided into sections known as rows. Rows go horizontally across the page. You can have as many rows on the page as you wish. Rows can be edited by clicking the blue Row tag (hovering over a row it will appear on the upper left corner). Rows help to organize and space out your content. Rows will have a default white space and padding to them (edited under Theme).

There are multiple ways to add rows here is the most common method.
To add a row:
- Click on the Row Tag of an existing row
- Choose Add (or Copy)
- Then choose Row above or below

You may also choose to COPY a row. This includes copying all the of the content within it. Similar to duplicating an entire page, but you are copying a single row. This is great for consistency! You can copy and paste an existing row and then edit it to save time, instead of starting with a blank row.
Columns
Column are used to subdivide rows. All rows have a single column by default. You can have a maximum 4 columns in a row. Columns allow you to organize content and place widgets side by side.
To add a column:
- Click on the Row Tag of an existing row
- Choose Add
- Then choose Column

On mobile devices columns collapse and stack on top of one another like rows. On mobile you can only have 2 columns.

Choose the Row Tag and editing its design in mobile you can choose how the columns in the row will behave. Stacking vertical is the default and is recommended.

Widgets
Widgets are what make the magic happen! These are drag and drop elements that place and control the visible content on your page.
To Add Widgets to a page:
- First navigate to a page you wish to edit
- Open the Widget panel from the left (+)
- Drag and Drop the desired widget on to the page
Be sure to drag and drop the widget on to the page. Clicking a widget in the Widgets panel will place the widget onto the current page into the first column of the first row of the active page.
To edit existing widgets on a page:
- Navigate to the desired page
- In the content area click on the content/widget
- The widget editor will pop-up
- Use the Content tab of the widget editor to change the content
- Use the Design tab of the widget to change visual design setting of the widget
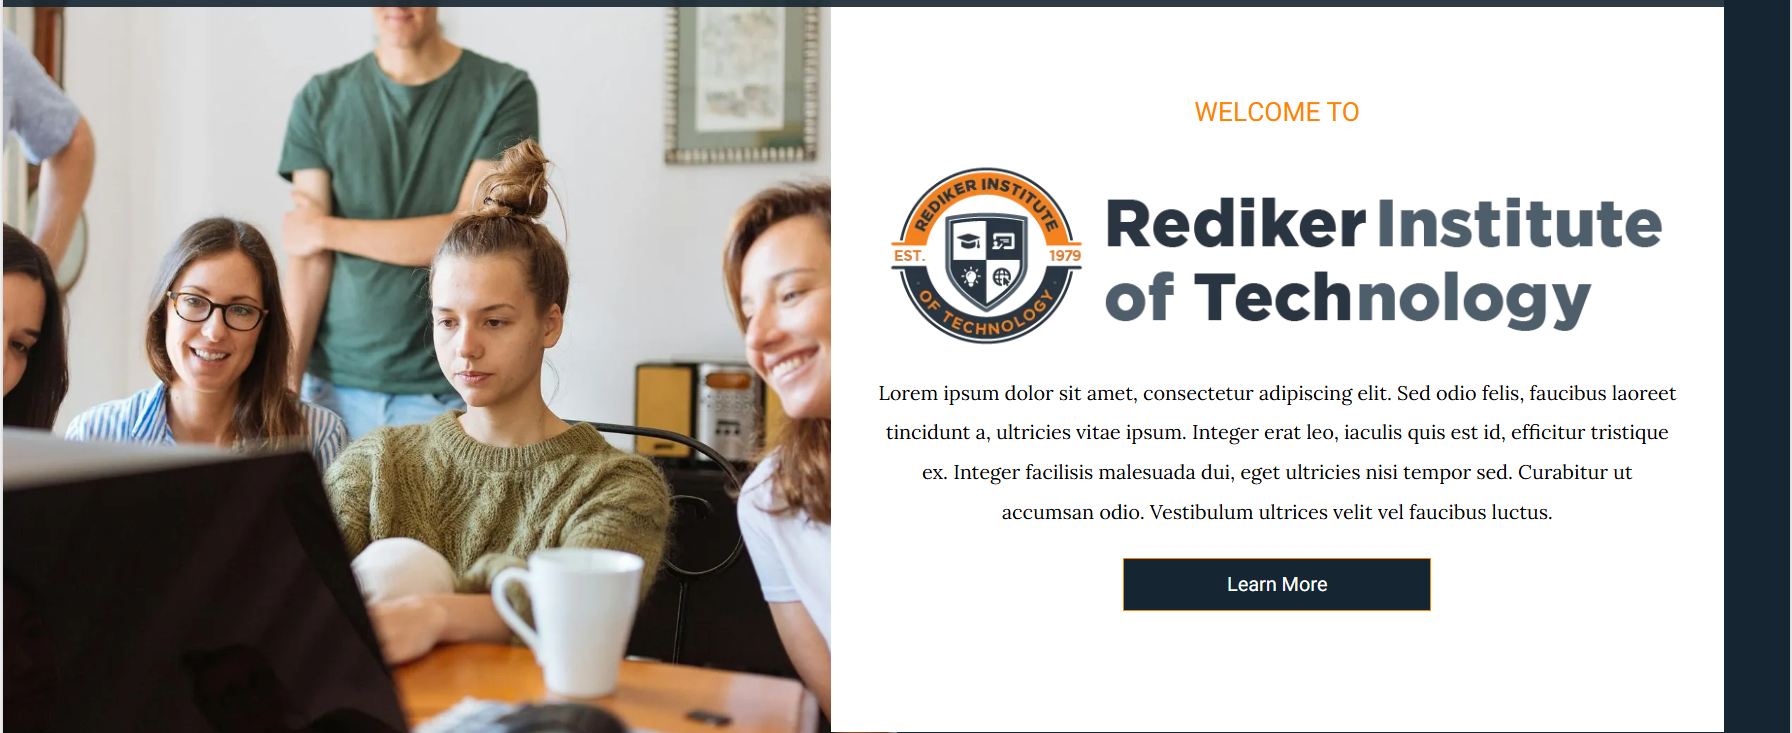
Content Example- In this row we have 2 columns, the column on the left simply has a background image, while the column on the right has text, image, and a button. In desktop view these columns are side by side.
However, these columns will stack when viewed on Mobile, the left column will be on top of the right column by default. This is another reason it is very important that you PREVIEW your content in the mobile view before republishing. The responsive design of the site means content will automatically change to fit different device sizes. And while it is generally pretty seamless, it is still a good idea to preview your content in different sizes first.
